Managing multiple garage doors with a single keypad might seem complicated at first, but Chamberlain makes it surprisingly straightforward. Whether you’re adding a second door, updating your PIN for better security, or setting a temporary code for a guest, the process is designed to be user-friendly and efficient. In this guide, we’ll walk you through everything you need to know—from programming separate PINs for each opener to changing and managing those codes over time. Whether you’re a first-time user or just need a refresher, this article has you covered.
Adding a PIN for a Second Garage Door Opener
If you have two or three garage doors (and openers) and you want one keypad to control them all, you will need to program the keypad to each opener using a different PIN for each. The process is similar to above, but you’ll do it separately for each opener:
- Decide on a unique 4-digit code for each door. For example, Door1 could be 2468, Door2 could be 1357.
- For Door #1’s opener, press its learn button, then go to the keypad and enter the first PIN (e.g. 2468) and press ENTER (hold until blink). Door1 is learned.
- For Door #2’s opener, press that unit’s learn button, then within 30 seconds enter the second PIN (e.g. 1357) on the same keypad and press ENTER until confirmation blink. Now Door2 is learned with the second code.
- Test each code on the keypad: entering 2468 should activate opener #1, and 1357 should activate opener #2.
This way, one physical keypad on the wall can operate multiple doors. Chamberlain confirms this: “To program the Keyless Entry to more than one garage door opener, repeat the programming steps using a new PIN for each additional garage door opener.”
You can store quite a few codes (up to 24 as noted earlier), but practically you’ll use just a couple. It’s advisable to write down which PIN corresponds to which door (but keep it in a secure place, not on the unit). If you ever need to change one of them, you can do so by reprogramming that door with a new PIN (the new code will overwrite the old code for that particular door’s memory slot in the opener).
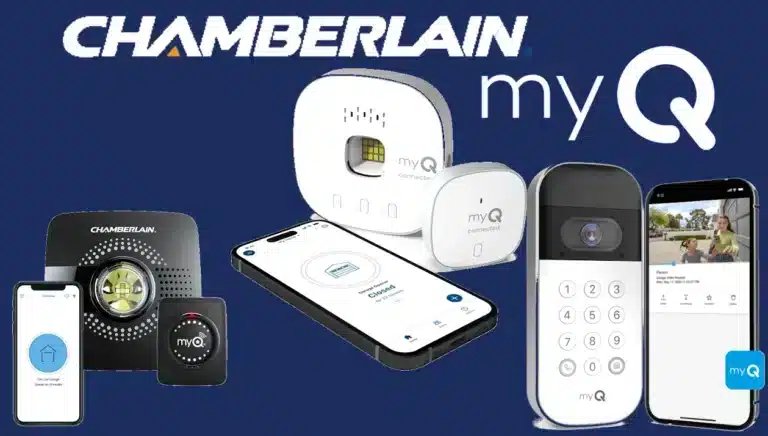
(Note: The myQ video keypad cannot add multiple openers, so if you have that model, you’re limited to controlling one door. You could still set multiple PINs, but they’d all trigger the same door – which is more for logging different users rather than controlling different doors.)
Changing the PIN Code for Chamberlain Garage Door Keypads
At some point, you may want to change your PIN – for example, if you feel it’s been compromised or you simply want to update it for security (a good practice is to change it every so often like you would passwords). There are two ways to change a code: via the keypad (if you know the current PIN) or by reprogramming via the opener’s learn button.
1. Changing PIN via Keypad (if current PIN is known):
Many Chamberlain Garage Door keypads allow you to change the existing PIN without using the learn button again. The procedure typically is:
- Enter the current PIN, then press and hold the
#button until the opener light blinks twice (this signals the keypad is in PIN change mode). - Then enter a new 4-digit PIN, and press
ENTER. The opener light should blink once to confirm the new PIN was accepted. - Test the new PIN (the old PIN should no longer operate the door).
This method updates the code for the same opener in the keypad’s memory. It requires that the keypad is already working with the opener (so the opener recognizes it), and that you remember the old PIN to initiate the change. Essentially, the keypad communicates to the opener “we’re changing the code now,” and the opener updates what code it expects from that transmitter.
Chamberlain support describes a version of this: “Enter the current PIN that you want to change. Press and hold the # button until the garage door opener light blinks twice… Enter the new PIN of your choice, then press ENTER. The light bulb on the garage door opener will blink once. To test, enter the new PIN then press ENTER – the opener will activate.”. This matches the typical steps above.
If you have multiple codes programmed on the keypad for different openers, changing one code via this method should only affect that opener’s setting. Other opener PINs would remain unchanged.
2. Changing PIN by Reprogramming from scratch:
If for some reason the above method doesn’t work or you forgot the old PIN, you can simply program the opener again with a new PIN using the original learn button method. Essentially you are “overwriting” the old code by teaching the opener a new code for that keypad. For example, if your old PIN was 2468 and you want to change it to 1350, just do the learn button procedure and use 1350.
The opener will then respond to 1350 and ignore 2468 going forward (assuming the keypad now sends a different signal for the new code – which it will). This approach is like treating it as a fresh setup. One thing to be cautious about: if your keypad had multiple codes for multiple doors, reprogramming one door with a new code won’t affect the others; but if you’re not careful and press learn on all openers and add new codes, you might inadvertently leave an old code stored in the keypad’s memory for an opener you didn’t update. Usually it’s fine – the keypad won’t send the old code unless someone knows it, and even if they do, the opener is no longer listening for it.
Forgotten PIN: If you completely forgot your PIN and can’t change it via method 1, method 2 (reprogramming) is your rescue. There isn’t really a “master reset” for just recovering the code – you just re-teach a new one.
Setting a Temporary PIN
As mentioned under features, you can set a temporary code for visitors or deliveries. Here’s how to do it on a typical Chamberlain keypad (940EV/877MAX style):
- Enter your primary PIN (the permanent PIN that currently opens the door).
- Press and hold the
✳(star) button or the#button (depending on whether you want a time-based or usage-based temporary code). – On many keypads, pressing and holding✳signals you will set a number-of-hours temporary PIN, while holding#signals a number-of-uses temporary PIN. Check your model’s instructions: the 940EV manual indicates one of these keys is used to initiate the temp PIN programming. - The opener light might blink in a certain pattern to indicate it’s ready to receive the temp code.
- Enter the temporary 4-digit PIN you want to use, then press
ENTER. (This programs the new temp code in the keypad’s memory.) - Now specify the duration or usage limit: enter the number of hours (if you chose the hour mode) or the number of openings (if in uses mode) that the code should work for, then press
✳for hours or#for uses to confirm. For example, if you want it to work for the next 4 hours, you’d press4then✳. If you want it to work for 1 use, you’d press1then#. The keypad should confirm with blinks (the exact blink count varies, but manual says it blinks when accepted). - Test the temporary PIN if you want, but keep in mind testing counts as a use if you set it by number of uses! If it’s hour-limited, you can test it once; if it’s use-limited, realize you might be using up one of the uses.
After the set number of hours passes, or after the set number of uses, the temporary PIN will expire and no longer operate the door
. At that point, you could remove it or just let it sit (it won’t function until you program a new one). Each permanent PIN can only have one temp PIN associated at a time
– you can’t have multiple overlapping temp codes off one permanent code. But you could have separate permanent codes each with their own temp (if you really had complex needs).
To cancel a temporary PIN earlier than planned, the easiest way is often to reprogram the main PIN (which flushes the temp) or set a new temp (overwriting the old). Consult the manual for specific cancellation steps if needed.
Erasing Chamberlain Garage Door Keypad Codes / Opener Memory
If you ever need to remove all programmed codes from your opener (for example, you lost a remote or you want to make sure no old PIN will work), you can erase the opener’s memory of remotes and keypads. This is done at the opener itself:
- Erase all remote/keypad codes from opener: Press and hold the LEARN button on the garage door opener unit for about 6 seconds until the learn LED turns off. On many units, the light will go out or you’ll hear a click. This action clears all remote controls and keyless entries from the opener’s memory. Essentially, the opener will forget all devices. You would then have to reprogram any remotes and any keypads you still use. This is a good security step if, say, you moved into a new house and want to ensure no old remotes are floating around, or if a PIN was known by someone who shouldn’t have access anymore. After erasing, verify that your old PIN indeed no longer opens the door. Then program a new PIN via the normal steps.
- Factory reset the keypad: Generally, keypads don’t hold a lot of state except the codes themselves. If you wanted to clear the keypad’s own memory of all codes (in case you were giving it to someone else or troubleshooting), some models can be reset by removing the battery and pressing some keys, or a combination like holding
*and#together until it resets. This isn’t often required – usually erasing the opener memory is sufficient, because any code in the keypad will be useless once the opener forgets it. If you’re troubleshooting, you can always just program new codes over old ones as needed.

