Having a Craftsman 1/2 HP garage door opener is quite common – this horsepower rating has been a standard for many residential openers for years. If you own a Craftsman 1/2 HP opener, its owner’s manual is your go-to guide for installation, programming, and troubleshooting. In this article, we’ll zero in on what the Craftsman 1/2 HP opener manual contains and highlight key information tailored to this size opener. From installation steps to maintenance tips, consider this a user-friendly walkthrough of your Craftsman 1/2 HP opener’s manual (in a casual, instructional tone).
Overview of Craftsman 1/2 HP garage door opener
A 1/2 horsepower garage door opener is generally suited for standard garage doors – think single-car doors or typical lightweight two-car doors. In fact, 1/2 HP models are the most popular choice for many households, striking a balance between power and cost. According to garage door experts, a 1/2 HP opener works best with doors that are 8 to 12 feet wide and of average weight (such as steel sectional doors or wooden doors without excessive decorative overlays). Craftsman’s 1/2 HP openers historically have been chain-drive units, though belt-drive versions also exist for quieter operation.
Your Craftsman opener manual will typically start by confirming the model and horsepower. For example, it might say “Craftsman 1/2 HP Model 139.xxx”. This lets you know you’re using the right manual for your unit. It will note the features of your specific model – many 1/2 HP Craftsman openers include features like:
- Safety Reversing Sensors (required on all openers since 1993),
- Security+ Rolling Code Remotes (which change the code each use for security),
- perhaps HomeLink compatibility (to work with in-vehicle buttons),
- and on newer ones, maybe smartphone connectivity via Craftsman’s MyQ/AssureLink system (some 1/2 HP models in the 2010s offered this as an upgrade).
Installation Steps (What the Manual Covers)
The manual will guide you through assembling and installing your 1/2 HP opener. Here’s a condensed overview in plain language:
- Rail and Trolley Assembly: Even a 1/2 HP opener comes unassembled. The manual shows how to connect the sections of the drive rail (if it’s a multi-piece rail, as many DIY opener kits are) and how to attach the trolley carriage that will pull the door. All the nuts, bolts, and screws needed are listed. At 1/2 HP, the motor is strong but not overly heavy – still, the manual suggests having a second person help when lifting the unit into place.
- Mounting Hardware: Craftsman provides a header bracket that must be attached above the door. The manual specifies the height (usually the bracket goes on the wall above the door, centered, and maybe 1-2” above the top of the door’s travel for sectional doors). It then instructs how to attach the rail to the header bracket with a clevis pin and fastener. Next, as per the manual, you’ll lift the opener and rest it on a ladder while you secure the unit’s hanging straps to the ceiling. For example, you might temporarily place a 2×4 on top of the door (in the open position) to gauge the correct height of the rail, then use perforated angle iron pieces to hang the motor head from the ceiling joists. The manual will have diagrams for this. Following these instructions ensures the opener isn’t at an awkward angle and that the trolley can move freely without binding.
- Safety Sensor Installation: The manual dedicates a section to installing the photo-eye sensors at each side of the garage door, near the floor. It will instruct you to mount them facing each other, 4-6 inches above the ground, with the sending sensor (amber LED) on one side and receiving sensor (green LED) on the other. Proper alignment is crucial – the manual often suggests using the provided wing nuts to loosely attach the sensors to their brackets, then fine-tuning alignment until the green indicator is solid (not flickering). If you have the 1/2 HP opener manual, it will say the door will not close if these sensors are not connected and aligned (for safety). This model’s manual also reminds you to secure the sensor wires up the wall and along the ceiling, out of harm’s way (usually with staples, but careful not to pierce the wire).
- Wall Control Wiring: Craftsman 1/2 HP openers usually come with a simple door control button (and sometimes a deluxe control panel depending on the kit). The manual diagrams how to run the two-strand wire from the wall button location to the opener’s terminals. Typically, you connect the white/red striped wire to the red terminal and the solid white wire to the white terminal on the opener. The manual emphasizes to strip the wire ends properly and secure them under the terminal screws firmly. For a 1/2 HP model, which often is a basic unit, the wall control might be a single push-button. The manual notes you can mount it by the access door inside the garage, about 5 feet high.
- Electrical Plug-in: The manual will have a caution about plugging the opener into a properly grounded outlet. 1/2 HP openers in the Craftsman line run on standard 120V home outlets. Ensure the outlet is within reach of the opener’s cord (if not, you’ll need an electrician to install one, as using an extension cord long-term is not recommended and often noted as a no-no in the manual).
After physical installation, the manual moves to setting up the opener’s functions:
Setting Limits and Force (Adjustment Instructions)
Your Craftsman 1/2 HP opener manual will carefully walk through adjusting the travel limits:
- Up Limit & Down Limit: These tell the opener when to stop opening or closing. The manual might say: Using a flathead screwdriver, turn the Down limit screw clockwise to decrease travel (door not closing fully)? or counterclockwise to increase (door stops too high off ground). It often takes trial and error – the manual recommends small turns (e.g., 1 turn = 2” of door travel, on many models). You’ll test the door and fine-tune until the bottom weatherstrip just contacts the floor with no significant pressure.
- Force Adjustments: On 1/2 HP units, there are typically two knobs labeled “Door Force” – one for the up/open direction and one for down/close. The manual contains a procedure to test and set these. Essentially, you want the minimum force necessary to operate the door smoothly. The manual might say to start at the factory setting and adjust if the door reverses unnecessarily or if it’s too heavy. Since a 1/2 HP opener can lift a decent load (manufacturers often rate them for doors up to ~350 lbs), force adjustments mainly ensure safety – e.g., if the door hits an object, it should reverse without needing excessive force. The manual will instruct to perform a reversal test: place a 2×4 under the door’s path and close it; the door should reverse upon hitting it. If not, the manual tells you to tweak the down force a little lower and test again.
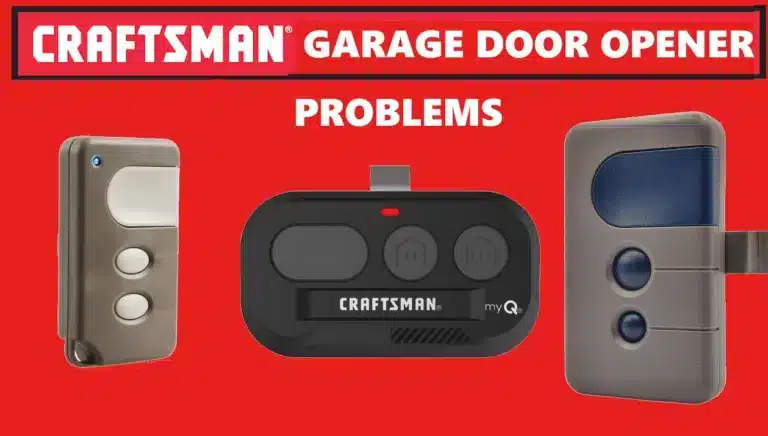
- Remote Controls and Keypad Programming: Craftsman 1/2 HP opener manuals include steps to program the included remote(s). Usually it’s: Press the Learn button on the back of the opener – the LED will glow. Within 30 seconds, press the button on the remote. The opener lights will blink to confirm the remote is programmed. That’s it! The manual might mention the color of the Learn button (e.g., red/orange or purple) and that you can program a certain number of remotes (often up to 5 devices). If your opener kit includes a wireless keypad, the manual will have a section for that too (often similar: press Learn, then within 30 seconds enter a 4-digit PIN on the keypad and hit enter, as described in the next article on keypads).
At this point in installation, the manual will have you run the opener through a full cycle test – opening and closing the door a few times to verify smooth operation and that it doesn’t bind or stop prematurely.
Common Features Explained in the Manual
Even though a 1/2 HP Craftsman opener is typically an “entry-level” in terms of power, it still comes with important features that the manual will explain how to use:
Battery Backup (if applicable): Most 1/2 HP units do not have battery backup (that’s more common on 3/4 HP models), but if yours does (Craftsman had a model with DieHard battery backup, possibly 3/4HP though), the manual would have a section on installing the battery and testing it. We’ll assume standard 1/2 HP without battery for now.
Lights: The manual notes that the opener’s light bulbs (usually one or two bulbs on the motor unit) will turn on when the opener is activated and turn off automatically (after ~4-1/2 minutes, typically). It also tells you how to use the wall control’s light button (if you have a multi-function wall pad) to turn the lights on or off manually. If your model allows it, the manual might mention you can change the interval the light stays on.
It also will specify the maximum wattage of bulbs you should use (for example, “Use A19 incandescent bulbs up to 100W; do not use short-neck or CFL bulbs if not supported, etc.”). This is important to prevent overheating or interference (some LED bulbs can interfere with remote signals, a note sometimes found in troubleshooting sections).
Lock/Vacation Switch: Some Craftsman 1/2 HP openers (if equipped with a deluxe wall panel) have a lock switch. The manual explains that activating the “Lock” (Security) feature will disable the radio receivers – meaning your remotes won’t work while it’s locked (the wall button will still work). This is useful when you’re away for an extended time.
The manual will usually caution to remember to unlock when you want to use remotes again. (If you accidentally hit this and didn’t realize, it can be puzzling – the manual’s troubleshooting chart includes “remote doesn’t work, wall button does” and reminds you to check the lock button). As a reminder, when the Lock is ON, the opener’s indicator light usually blinks and the remote signals are ignored.
Safety Reversal System: We touched on this, but the manual explicitly instructs on testing the photoelectric sensors and the contact reverse. For the sensors, it will say that the green LED on the receiving eye must be solid. If the door won’t close and the opener lights flash, align the sensors (often referencing an earlier installation step). It also may describe the override: holding the wall button continuously will close the door even if the sensors are not functioning (the door will close as long as you hold the button, in “constant pressure” mode). This is only meant for an emergency override – the manual stresses not to use the opener normally without working sensors.
Force Guard (Auto-Force): Some modern Craftsman openers automatically adjust force based on changing weather (a cold door might be stiffer). The manual might note that the opener “senses” force and you might hear it make incremental adjustments. If your 1/2 HP model has this feature, it will be described to not be alarmed if it seems to run a bit differently in winter vs summer.
Sources:
- Quality Overhead Door – Garage Opener Horsepower Guide (1/2 HP works for most standard doors)
- Hunker Home – Garage Door Opener Tips (importance of chain tension and not overtightening)


