

LiftMaster remotes are battery-powered devices, and like any battery-powered gadget, they eventually need a battery change. Using the correct battery type is important for proper operation. Here we’ll list common battery types for popular models and explain how to change them.
Battery Types for LiftMaster Garage Door Remotes and Keypads
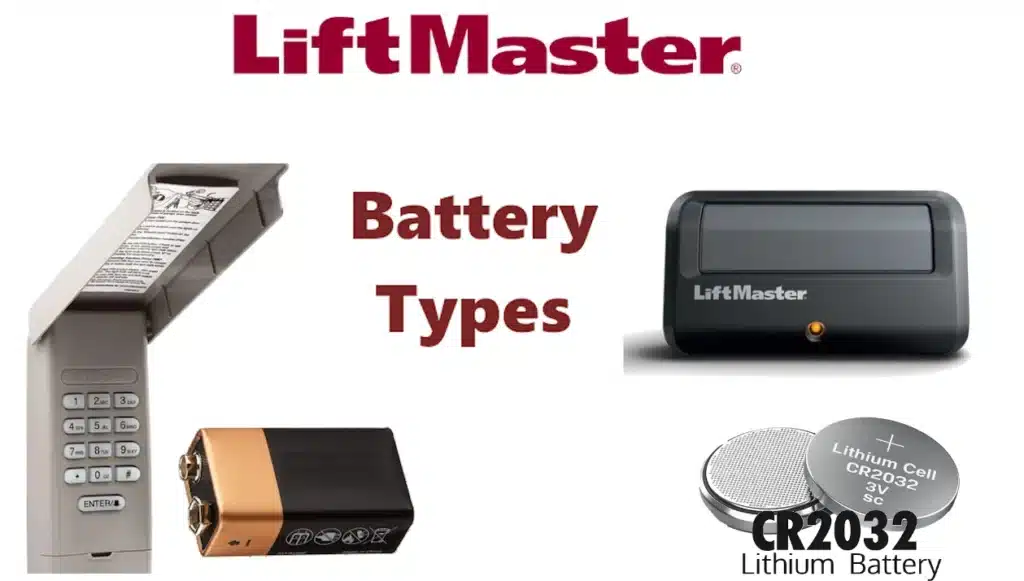
Most LiftMaster visor remotes and keychain remotes use small coin-cell lithium batteries. The 3V CR2032 coin cell is extremely common in these remotes. For example, the 371LM one-button remote uses a CR2032 battery, as do the 891LM and 893MAX (the manuals specify a 3V lithium coin battery, often CR2032). These coin cells look like a flat silver disk (about the size of a nickel coin). Some older or larger remotes use a different battery: certain older 2-button or 3-button remotes (like the very old LiftMaster 62LM, 63LM from the early 90s) used a 9V rectangular battery.
But those are rarely seen today. Another type you might come across is the 12V mini-alkaline battery (A23), which is used by some other brands and a few older universal remotes. However, the vast majority of LiftMaster-brand remotes in circulation use coin cells for their compact size and long shelf-life.
The wireless keyless entry keypads often use a 9V battery (the square kind you’d put in a smoke detector). For instance, the LiftMaster 877MAX keypad uses a 9V battery inside the bottom compartment (LiftMaster keypads historically have used 9V for the needed power to illuminate the keypad and transmit). Always check your device’s manual or look at the existing battery to be sure of the type. Using the wrong voltage can either result in a non-working remote or even damage it.
How To Change Battery In LiftMaster Garage Door Opener Remote
Replacing the battery is generally straightforward and doesn’t require reprogramming the remote (the codes are stored in non-volatile memory). Here are the general steps:
- Open the Remote’s Case: Most remotes have a two-piece plastic casing that snaps together. To open it, locate the notch or seam along the side. Often, you can use the visor clip as a tool to pry open the case – insert the end of the metal clip into the notch and twist gently. If the remote doesn’t have a visor clip, use a small flathead screwdriver or even a coin. Be gentle but firm; the halves will pop apart. For keychain remotes, sometimes there’s a small screw on the back to remove first (check for any tiny Phillips screws). On keypads, the battery compartment is usually accessed by sliding the cover up or opening a bottom lid.
- Remove the Old Battery: Once the remote is open, you’ll see the round coin battery (or whatever battery it uses) on the circuit board. Carefully slide it out. In some designs, there may be a small clip holding it – you can push the battery out from one side. Take note of the orientation – usually the side with the “+” (positive) marking should be facing up. Keypads with 9V batteries have a snap connector; just unsnap the old 9V battery.
- Insert the New Battery: Replace with the same type of battery (e.g., new CR2032 coin cell, positive side up). Avoid touching the circuitry too much; just pop the new battery in under the metal contacts. If it’s a coin cell, you might slide one edge under the contact and then press it in. For 9V, snap the connectors onto the new battery’s terminals (match large to small terminal).
- Close the Remote: Align the two halves of the case and snap them back together. Ensure it clicks all around and is firmly closed. For any screws that were removed, put them back in. The remote should look just as it did before opening.
- Test the Remote: Stand near the door (for safety) and press the button. The door should activate as usual. Typically, there’s no need to reprogram the remote after a battery change – the remote retains its settings. If it doesn’t work, double-check that the battery is installed correctly (polarity right-side-up) and that nothing was disturbed on the circuit board. Also ensure the new battery is fresh (if you have a voltmeter, a fresh CR2032 should read ~3.3V out of package).
Some indicators that your remote’s battery was dying include reduced range (having to get very close to the door for it to work), a dim or no LED light on the remote when pressing the button, or intermittent operation. If you encounter these, a battery swap is likely needed. LiftMaster remotes generally have a long battery life – often several years on a coin cell – since they only use power in short bursts when you press the button. Many remotes even come with a “5-year” lithium battery from the factory. But real-world usage, temperature, and battery shelf age can vary that. So if your remote is a few years old, it doesn’t hurt to put in a fresh cell.
Also, be environmentally conscious: dispose of old batteries properly. Coin cells especially should not be left where children can get them, as they pose a swallowing hazard. Many home improvement stores or electronics stores have battery recycling drop-offs. In any case, a new battery will ensure your LiftMaster remote continues to work reliably, keeping your garage accessible with one click.


