The LiftMaster Learn Button on a LiftMaster garage door opener is a crucial feature that simplifies programming and syncing remote controls or keypads with the garage door system. The Learn Button is on the motor housing of the opener. It makes a secure connection with the opener so that new remotes, keypads, and other accessories can be paired. Many times, it is color-coded (red, yellow, purple, or green) to show which remote or device is compatible and what frequency it works at with the Learn Button.
To pair a remote, all you have to do is press the LiftMaster Learn Button until its light turns on. This lets you know that it is ready to connect with a remote. Next, press the button you want on the remote to finish pairing. This Learn Button can also reset the opener or delete all paired devices. This is especially helpful for security if the remotes are lost or stolen. For best results, check the manual or LiftMaster’s website to see which remotes work with the Learn Button’s color.
Where Is the Learn Button on LiftMaster Garage Door Opener?
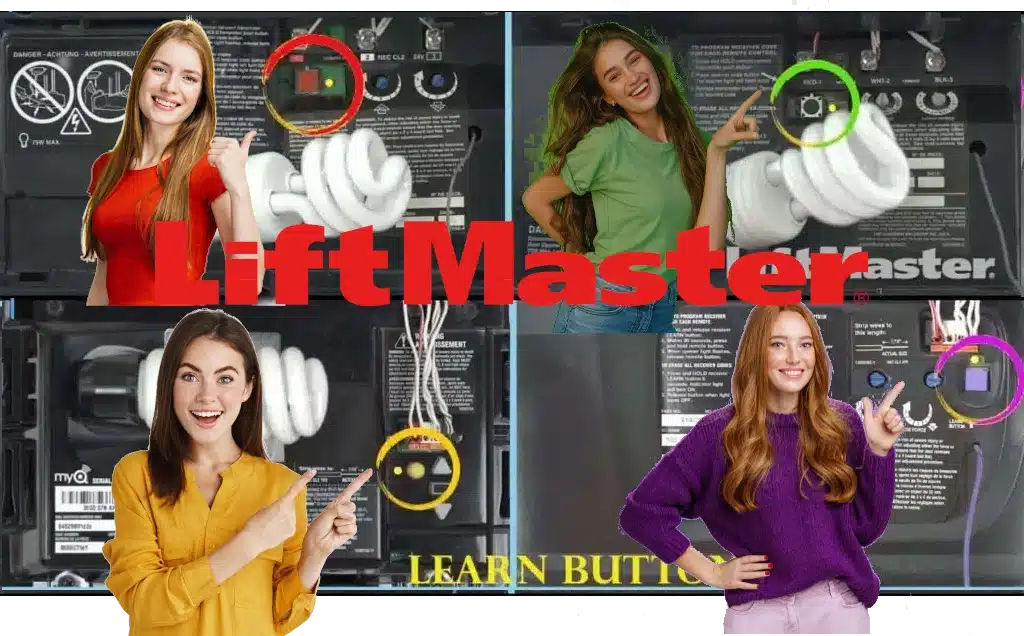
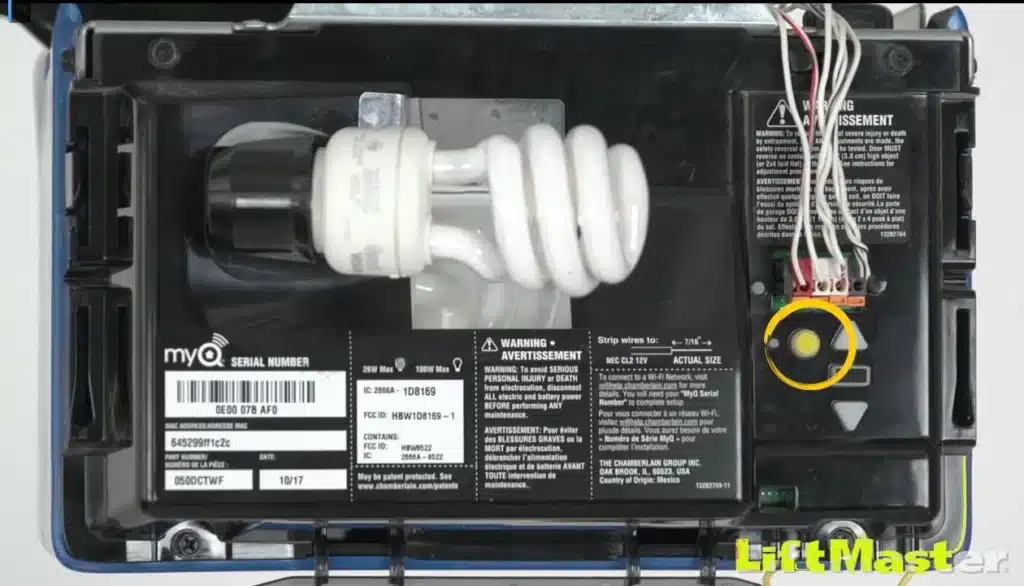
To locate the LiftMaster Learn Button on your LiftMaster garage door opener, start by examining the motor unit, typically found on the ceiling of your garage. Most of the time, the Learn Button is on the side or back of the motor housing, close to the antenna wire that hangs down. It is small and usually comes in colors like yellow, purple, red, or green, which can help you figure out what model you have and which frequencies work with it.
There may be a panel or light cover on the motor that you need to remove in order to get to the LiftMaster Learn Button. When you press the Learn button, programming mode starts once it has been found. Here, you can add new remotes or keypads and delete old ones.
The unit will light up to show that it is ready to connect to a device when the button is pressed. One more thing that this Learn Button can do is erase or reset paired devices. This can help you make things safer. For specific steps, look at the manual that came with your LiftMaster. The buttons may be in a different place or be a different color depending on the model.
Color Codes for the LiftMaster Learn Button
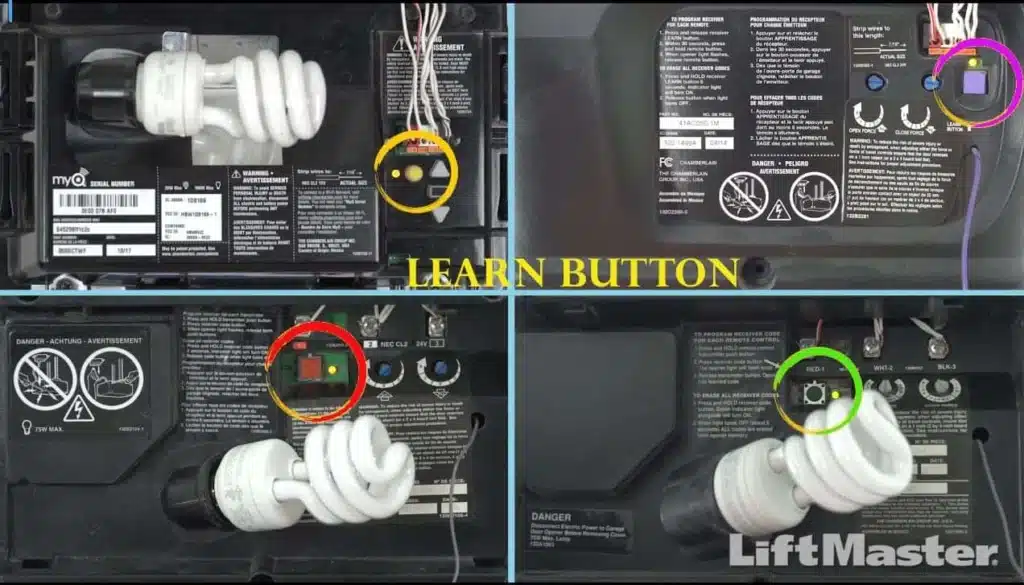
The LiftMaster Learn Button on a LiftMaster garage door opener is color-coded to indicate specific features, frequencies, and compatible accessories. People can tell what kind of remotes, keypads, and other devices work with their opener by the colors they use, which are usually yellow, purple, red/orange, and green.
- liftmaster yellow learn button instructions: This color is used with newer models that usually work on a frequency of 390 MHz.You can use Security+ 2.0 remotes and accessories with it to make it even safer.
- liftmaster Purple learn button instructions: One type of model that is purple is one that works at 315 MHz and supports Security+ remotes and keypads. These have rolling code technology for extra safety.
- liftmaster Red/Orange learn button instructions: This color is common on older models. It usually works on a frequency of 390 MHz and works with original Security+ accessories. It is a simple way to pair devices remotely that does not offer any extra security.
- liftmaster Green learn button instructions: This usually means an older model that works at 390 MHz and can work with basic remotes that do not have rolling code technology.
These colors not only show which remotes work with LiftMaster Learn Button setups, but they also give users a sense of the different security levels and frequency variations so they can pick the right accessories. For exact information on whether or not the LiftMaster Learn Button will work with your model, always check the manual.
LiftMaster Learn Button on Wall Control Panels
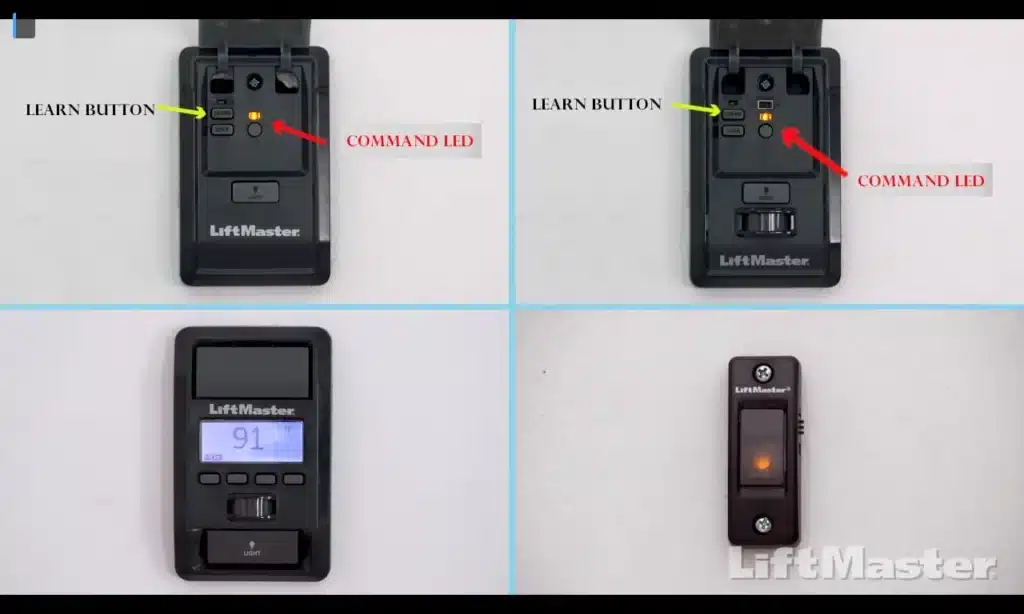
On some Lift Master wall control panels, the LiftMaster Learn Button is situated behind the push bar—the part you press to open or close the garage door. Lift the push bar to see extra buttons and indicators under. Usually rectangular and boldly labeled, the LiftMaster Learn Button Though the model will affect its exact location, it is usually highly visible for simple access and identification.
Once located, the LiftMaster Learn Button lets you program remote controls, keyless entry systems, and other accessories straight from the wall control panel, so eliminating the need to reach the motor unit. This feature makes garage door opener system setup easier and more convenient.
Programming Remotes and Keypads with the LiftMaster Learn Button
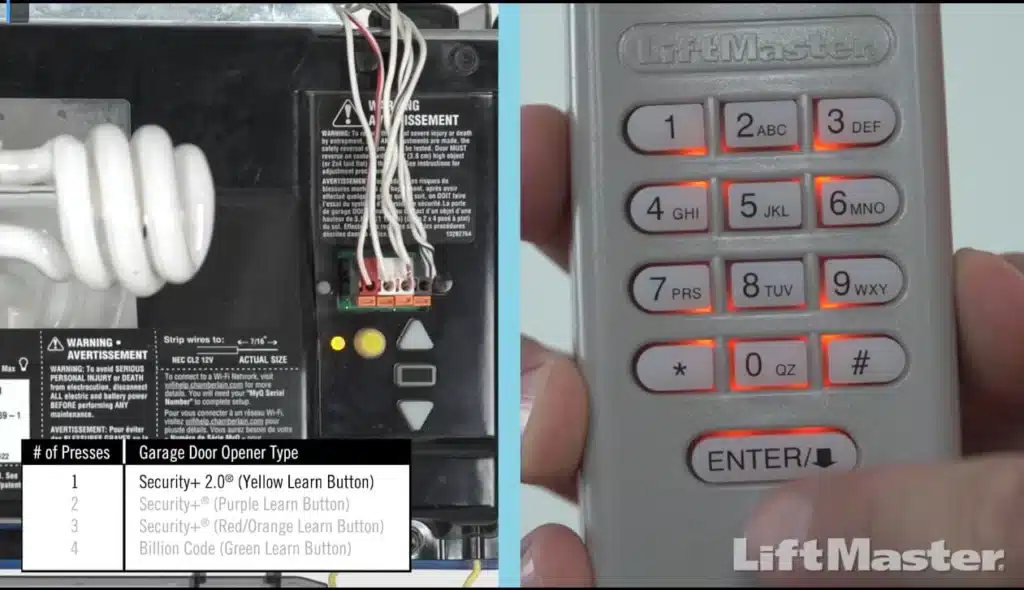
The Learn Button on your LiftMaster garage door opener makes it easy to set up. You can use this to connect remotes, keypads, and other devices to your garage door and control it.
- Locate the LiftMaster Learn Button: On most motor units, it is on the side or behind a light cover. It can be marked with purple, green, red/orange, or yellow. If you are not sure, look in the manual that came with your model.
- Initiate Programming Mode: Press the LiftMaster Learn button once to start programming mode. When the opener is ready to connect to a keypad or remote, a light next to it will either turn on or start blinking.
- Sync the Device: When you press the LiftMaster Learn button, hold down the button on the remote or keypad that you want to program for 30 seconds. When you hear a click or see the lights on the motor unit blink, that means the programming went well.
- Test the Connection:Press the set button on the keypad or remote to make sure the door opens. This will test the connection.
You do not need tools or help from a professional to do this quick process because the LiftMaster Learn Button makes it easy.
LiftMaster Learn Button isn’t working
If the Learn Button on your LiftMaster does not work, there may be a problem with the power supply, wiring, or parts inside the machine. Often, these things work to fix issues:
- Check the Power: Make sure that power is getting to the garage door opener. On the motor unit or wall control panel, look for lights that show when something is wrong. If they are not on, check the power outlet or circuit breaker.
- Inspect the Antenna: If the antenna on the motor unit is broken or not lined up right, it can make remote programming impossible. Check to see that the antenna is fully extended and not broken.
- Reset the System: It is possible that a simple reset will fix the LiftMaster Learn Button that will not work. Take the opener off the wall, wait one minute, and then put it back in.This might get rid of any junk on the inside and get them to work again.
- Examine the LiftMaster Learn Button: Should it become worn out or stuck, its expected performance would be compromised. Press it gently to check if it moves; if it has dirt or dust on it, it could stick.
- Seek Professional Help: Should troubleshooting fail to fix the problem, a more significant logical board or circuitry issue of the opener may call for professional repair or replacement.
Syncing a Car’s Built-in Garage Door Opener Using the LiftMaster Learn Button
Programming the built-in garage door opener—often known as HomeLink—of your car to run with another LiftMaster garage door opener is simple using the LiftMaster Learn Button. To achieve this:
- Clear Previous Programming: In your vehicle, hold down the first and third HomeLink buttons until the indicator light flashes, so confirming that any past programming has been erased.This could take ten seconds or so.
- Enter Pairing Mode on HomeLink: Next, hold down the desired HomeLink button and the button on your LiftMaster remote simultaneously until the HomeLink system’s indicator light moves from a slow to a rapid blink. Enter Pairing Mode on HomeLink. Usually this takes 10 to 20 seconds.
- Activate Learn Mode on LiftMaster: by quickly visiting your LiftMaster motor unit and pressing the LiftMaster Learn Button. Usually, you have thirty seconds to finish this step following HomeLink button press.
- Finalize Pairing: Press the HomeLink button you programmed for two seconds when you return to the car. If needed, repeat this process until your garage door turns on to verify a good pairing.
Connecting Your LiftMaster Opener to the myQ App Using the LiftMaster Learn Button
The LiftMaster Learn Button is needed to connect your garage door opener to the myQ app. This button also lets you control and monitor your garage door from afar. Here’s how to use the LiftMaster Learn Button for setting up myQ:
- Locate the LiftMaster Learn Button: Most of the time, the LiftMaster Learn Button is on the motor unit, near the antenna wire and maybe under a light cover. The model and fit are shown by the color, which could be yellow, purple, red/orange, or green.
- Initiate Wi-Fi Learn Mode: Press and release the LiftMaster Learn Button twice starting Wi-Fi Learn Mode. Blue LED indicator will indicate the opener is in Wi-Fi Learn Mode and ready for myQ configuration.
- Connect via the myQ App: Open the myQ app on your smartphone and follow in-app directions to add a new device. The app will walk you through tying the opener to your Wi-Fi network.
- Complete the Setup: Once linked, the myQ app lets you remotely monitor and operate your garage door, so improving convenience and security.
Using the LiftMaster Learn Button on the Wall Control Panel
Some LiftMaster models include a Lift Master Learn Button into the wall control panel, which simplifies direct remote and keypad programming without involving the motor unit. Usually found under the main push bar, the big button used to open or close the door, this button may need lifting the cover or looking under a small panel on the wall control.
Use this wall-mounted LiftMaster Learn Button by first:
- Access the LiftMaster Learn Button: Press the push bar to view any extra buttons or panels and find the LiftMaster Learn Button. It is often labeled for simple access.
- Enter Programming Mode: Press and hold the LiftMaster Learn Button until the indicator light turns on, so indicating the opener is ready to couple with a remote or keypad.
- Sync Your Remote or Keypad: Press a button on the remote or enter a code on the keypad you wish to sync within 30 s. Pairing is successful when the light blinks of the opener.
Particularly in multi-door configurations where the opener might be difficult to reach, using the LiftMaster Learn Button on the wall control panel is especially handy for quick programming without accessing the motor unit.
Resetting Your LiftMaster Opener Using the LiftMaster Learn Button
Use the LiftMaster Learn Button to reset your LiftMaster garage door opener using these guidelines:
- Locate the LiftMaster Learn Button: The LiftMaster Learn Button is located on the motor unit of your garage door opener. Usually close to the antenna wire, it may be green, purple, red or orange.
- Erase Existing Codes: Press and hold the LiftMaster Learn Button for about six seconds until the indicator light turns off. This removes from the opener’s memory all remote control and keyless entry codes.
- Reprogram Your Devices: You must reprogram your remote controls and keypads after reseting:
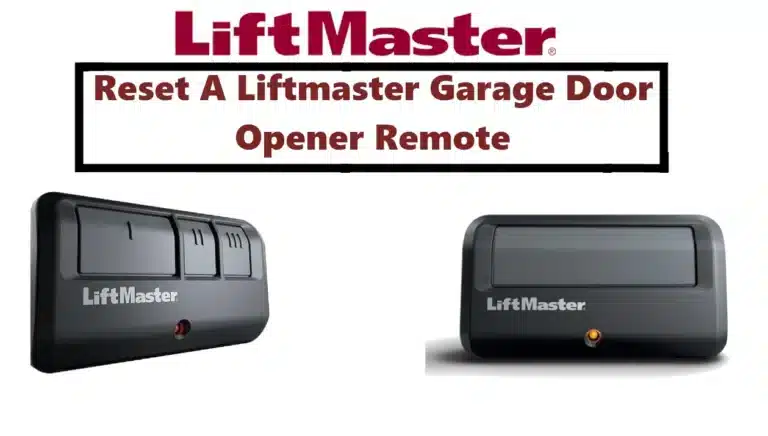
- For Remotes: Press the LiftMaster Learn Button once (the indicator light will turn on) then on your remote control the desired button. The lights of the opener will blink to verify effective programming.
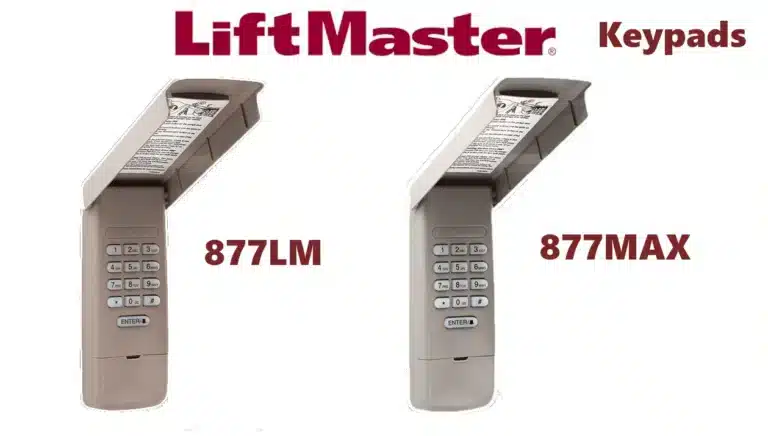
- For Keypads: Press the LiftMaster Learn Button once, then within 30 seconds enter your new four-digit PIN on the keypad and press Enter. The lights of the opener will blink to verify the new code.
If you lost a remote, moved into a new house, or wish to remove all past codes for security concerns, performing this reset with the LiftMaster Learn Button will help. Always refer to the handbook for your particular model for comprehensive directions; procedures vary.

